If you own Microsoft Publisher 2003 or later, you’re in luck. You can use the application to create an e-mail newsletter and then e-mail it to your customers from within the program, which makes the task much easier. In this article, I’ll explain how to create and send an e-mail newsletter in Publisher 2003.
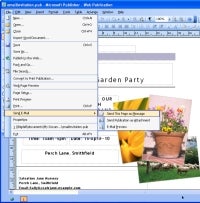
 If you’re using Publisher 2003 and Outlook 2003 or Outlook Express you can e-mail a newsletter from inside Publisher. (Click for larger image). |
Choose E-mail Newsletter Templates and Fonts
Launch Publisher 2003 and from the Web Sites and E-mail design list, select E-mail and then select the design to use. If you already use a design set for your other marketing materials, then choose the same one here so that you maintain a consistent brand with your e-mail newsletter. Click to open your template.
From the Color Schemes dropdown list, select a color scheme for your newsletter. Again if you use a particular color scheme for your other documents you should use the same one here.
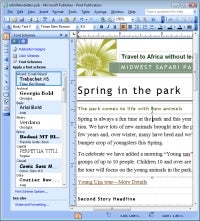
Be careful when choosing a Font Scheme. A font will display properly only if the particular font is available on the newsletter recipient’s computer. Always choose font combinations that include “Web-safe fonts” — fonts that exist on most people’s computers. These include Arial, Arial Bold, Comic Sans MS, Courier, Georgia, Verdana, Times New Roman and Trebuchet MS.
Avoid schemes that include fonts such as Perpetua Titling, Lucida Sans and so on as they are unlikely to be on all recipients’ computers and will not display correctly when used in an e-mail.
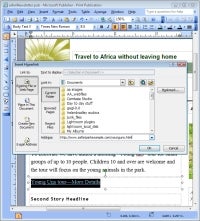
 Instead of telling the whole story in the newsletter, link to the remainder of the story on your Web site. (Click for larger image). |
Add Your Marketing Content
You are now ready to work on the newsletter itself. Type your business’s details into the top of the newsletter in areas marked for the business tag line and business name. Add your logo if it does not automatically appear in the design. Next, type the title of the newsletter along with the volume and date information — or remove these elements if you do not want to use them.
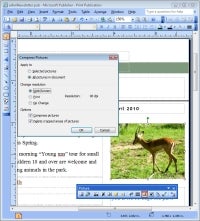
Now replace any images in the newsletter design with your own images. This next step is important; select one image and, from the Picture toolbar, select the Compress button.
Choose All Pictures in Document, Web/Screen and Compress Pictures and click OK.
 When choosing a font scheme, choose one which includes Web-safe fonts like Arial, Trebuchet MS and Times New Roman. (Click for larger image). |
This compresses the images so that, when you e-mail the newsletter to your customers, you send only the actual image size required — even if the original was much larger.
Continue to edit the document by replacing the placeholder text with details of the newsy stories you want to tell. When any entry includes a More Details item, select it, right-click and choose Insert > Hyperlink and create a hyperlink to the remainder of the story on your Web site.
This is an important step as it encourages readers to go to your Web site for additional information. This keeps your newsletter concise — e-mail newsletters can’t be more than one page long — and it’s easier for recipients to read.
You can select and delete any stories included in the template that you do not need. If you need more stories than the template provides, copy the elements in the newsletter and paste them at the bottom of the screen above the footer to create placeholders for additional material.
You may need to move placeholders around so they don’t overlap. If you need to enlarge or shorten the page, choose File > Page Setup > Layout to make the page larger or smaller. While you can add room to the length, do not add to the width as e-mail newsletters will not display correctly if they are very wide.
 Always compress images in outgoing e-mail newsletters so you’re not sending unnecessarily large, bloated messages. (Click for larger image). |
When you send an e-mail newsletter, you must include a way for a reader to be removed from your list. Make sure to complete the link at the foot of the newsletter by linking it to the tool you use for this purpose.
Send Your E-mail Newsletter
When you’re ready to preview your message, choose File > Send E-mail > E-mail Preview to proof the message before sending it. If you’re happy with how it all looks, you’re ready to send it.
To e-mail the newsletter, choose File > Send E-mail > Send this page as message. This opens an e-mail dialog at the top of the page into which you can type the recipient’s e-mail address. Click Send.
For the e-mail-from-Publisher feature to work, you must use Publisher 2003 and Outlook 2003 or Outlook Express. The benefit is that the e-mail is sent as an html document so it your recipients can read it even if they don’t have Publisher installed on their computers.
If you are using Microsoft Publisher 2007 you can create a distribution list and merge the newsletter and a list directly to Outlook from inside Publisher 2007. This feature is not available in Publisher 2003.
While Microsoft improved the newsletter features for e-mailing newsletters in Publisher 2007, you can still achieve good results in Publisher 2003 and send e-mail newsletters to a small e-mail list.
You’ll find lots more software tips and tutorials from Helen Bradley in our Small Business Essential series, How-To With Helen Bradley.
Helen Bradley is a respected international journalist writing regularly for small business and computer publications in the USA, Canada, South Africa, UK and Australia. You can learn more about her at her Web site, HelenBradley.com
| Do you have a comment or question about this article or other small business topics in general? Speak out in the SmallBusinessComputing.com Forums. Join the discussion today! |

